AP Mode: Alternative Set Up
Use this method to set up a Smart Socket 3.0 device on the Brilliance Smart app when working with older routers that have one Wi-Fi network name. Some older routers with one Wi-Fi network name will not be able to recognize a 2.4 GHz device. Download these instructions in a PDF.
Technical Requirements
Must have consistent 2.4 GHz Wi-Fi signal at the installation location with dBm strength of -70 or better.
Note: if you are looking for the instructions for the legacy version of this product, Smart Socket 2.0, click here and scroll to the AP Mode section.
1. Download/open the Brilliance Smart app from the Apple App Store or Google Play by scanning the QR code. Register for an account if you are a first time user.

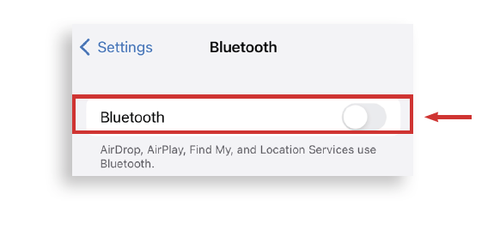
2. In your phone’s settings, make sure Bluetooth is turned off.
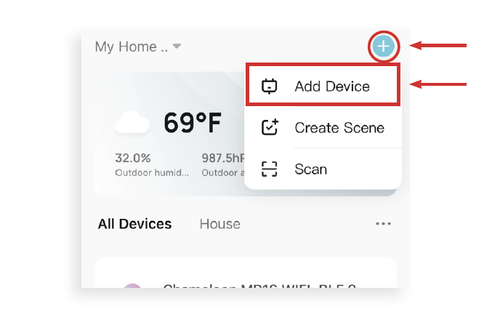
3. Open the Brilliance Smart app and tap the Add button in the upper-right corner. Then tap Add Device.
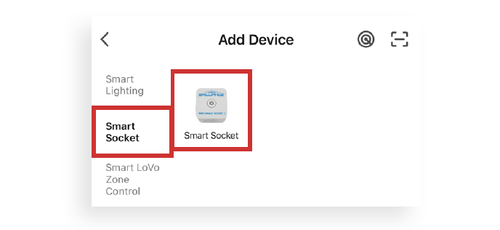
4. On the Add Device screen, tap Smart Socket on the left menu and then tap Smart Socket in the main window.
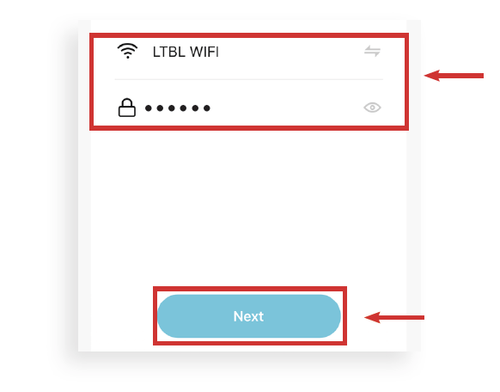
5. Enter your 2.4 GHz Wi-Fi network name and password, and then tap Next.
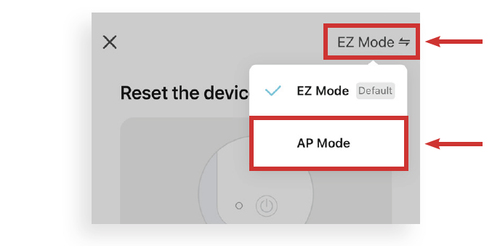
6. On the Reset screen, tap EZ Mode in the upper-right corner and then tap AP Mode.
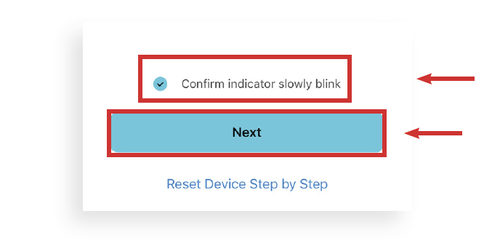
7. Now you can reset the device. Hold the power button down for 5 seconds.
The lights in the power button of the Smart Socket 3.0 will begin to flash slowly to indicate the device is in AP Mode.
To continue, tap Confirm indicator slowly blink and then tap Next.
8. The next screen will take you to the device’s general settings once you tap Go to Connect.
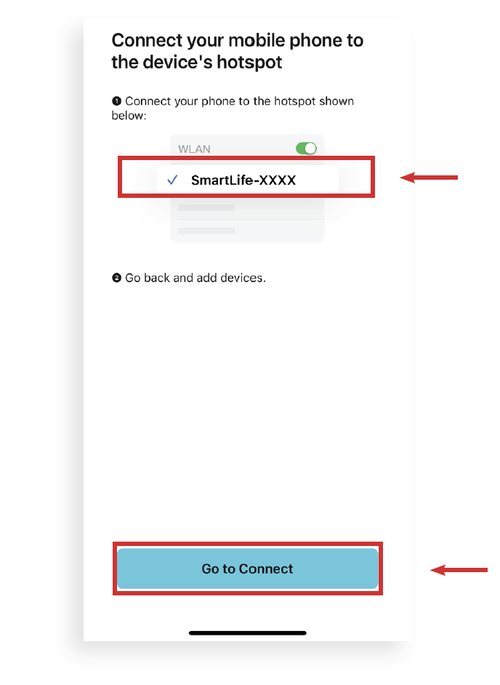
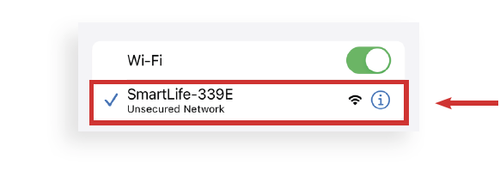
9. Go to your Wi-Fi networks, scroll and tap the network with SmartLife in the name.
10. Once the Smart Life network is connected, re-open the Brilliance Smart app.
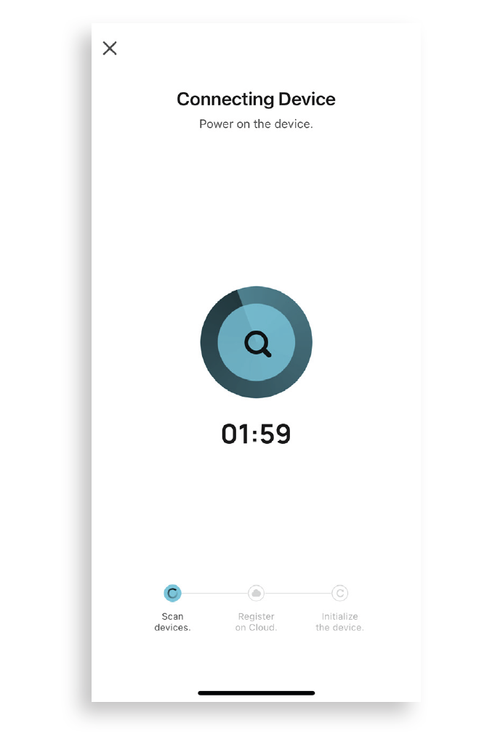
The Connection screen shows the Smart Socket loading. It could take up to 2 minutes to populate.
After the Smart Socket has connected, AP Mode Set Up is complete and you can further program the device.