
Bluetooth Set Up – Preferred
Connect a Smart Socket 2.0 to the Brilliance Smart App.
1. Download Brilliance Smart from the Apple App Store or Google Play by scanning the QR code. Register for an account if you are a first time user.
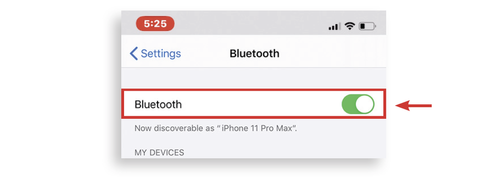
2. In your phone’s settings, make sure Bluetooth is turned on.
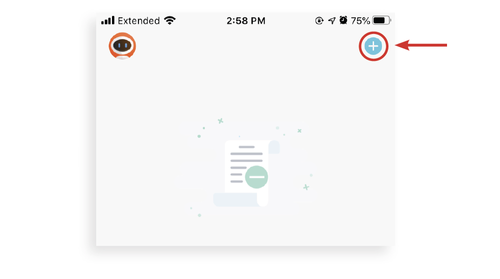
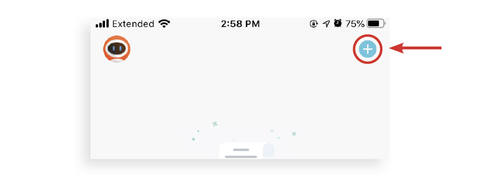
3. Open the Brilliance Smart app and tap the Add button in the upper-right corner.
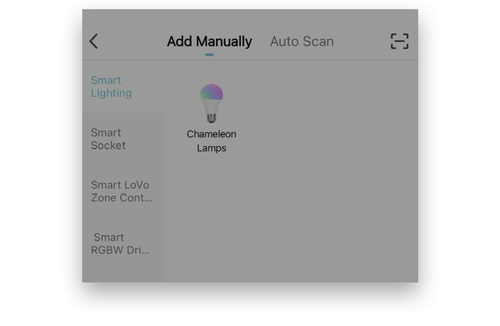
4. The Add Manually tab is displayed and the Bluetooth begins looking for a new device.
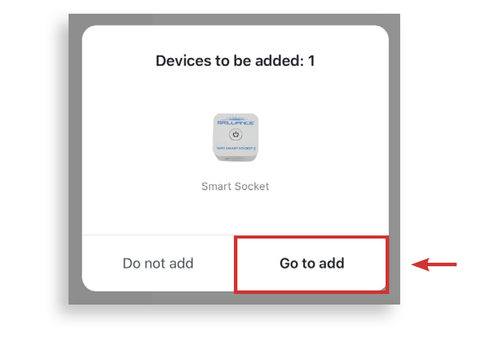
5. When the device pairs via Bluetooth, the Devices to be Added box is displayed. Tap the Go to Add button.
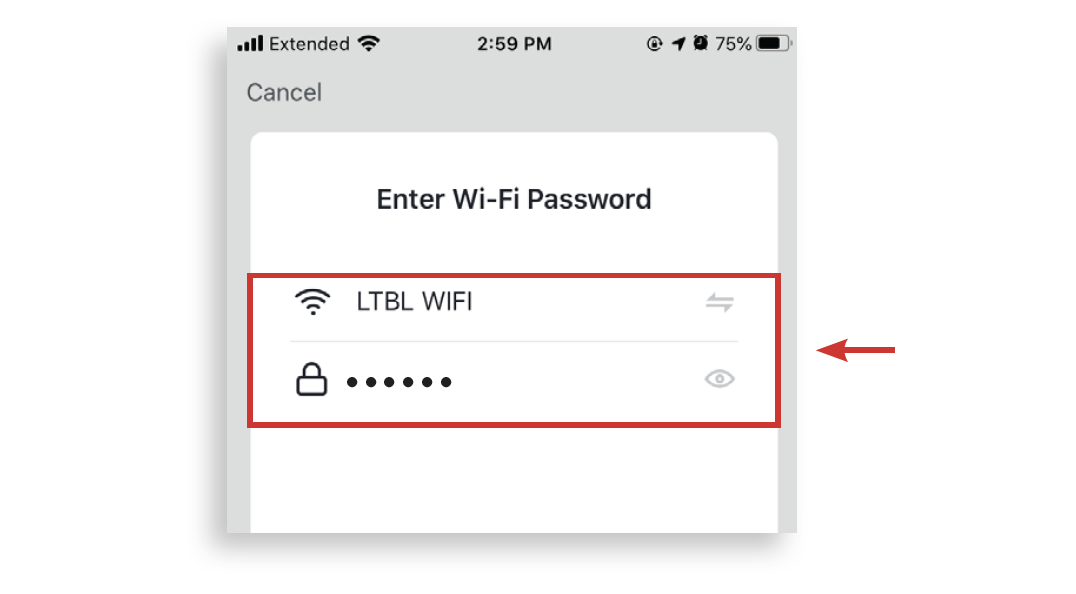
6. Enter your 2.4 GHZ Wi-Fi information and tap Next.
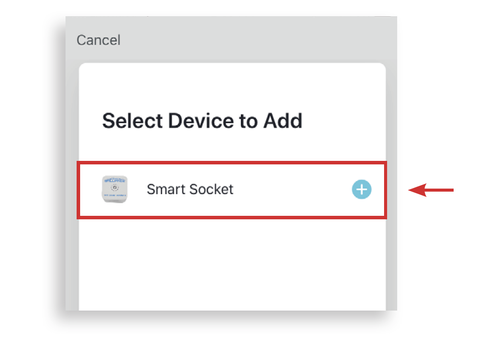
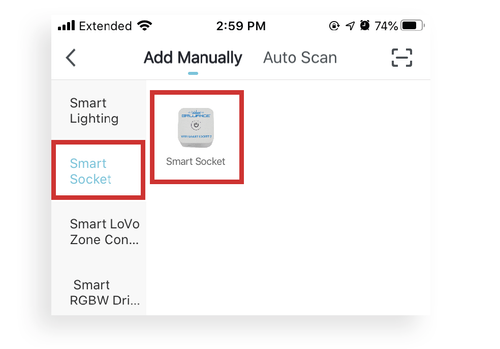
7. On the Select Device to Add screen, tap Smart Socket.
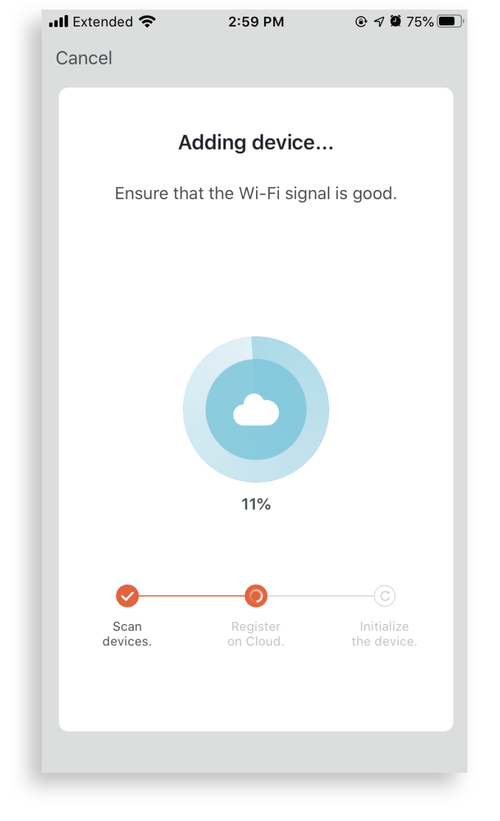
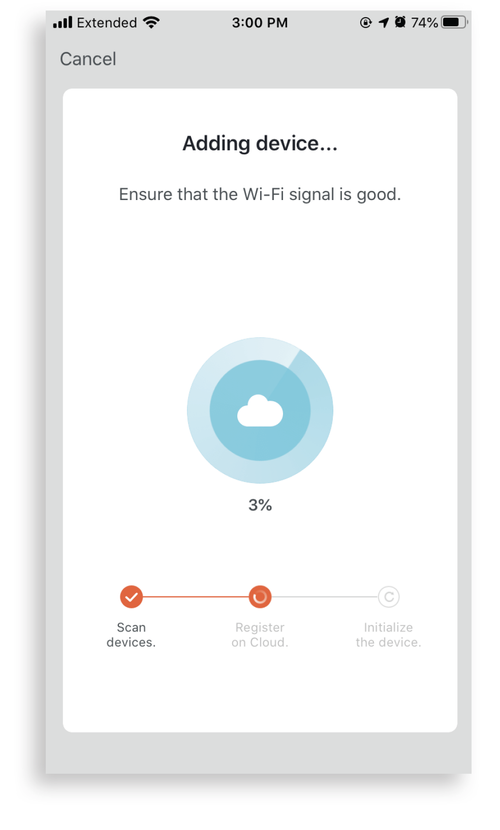
8. The Adding Device screen is displayed while the app connects to the Smart Socket.
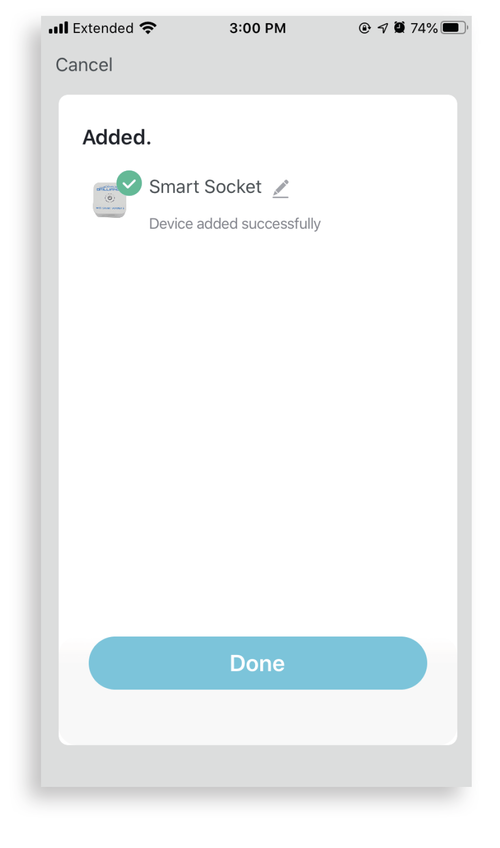
9. When the device is connected, the Added screen is displayed. Tap the Edit button to rename the device, then tap Done to finish.

NOTE: If Bluetooth Set Up does not connect, use the Quick Mode Set Up instructions.
Quick Mode – Setting Up Multiple Devices
Open the General Settings on your handheld device. Connect your device to the 2.4GHZ Wi-Fi network. Use this method when you can identify a 2.4GHZ Wi-Fi network.
1. On the home screen, tap the Add button at the upper-right corner.

2. On the Add Manually screen, tap Smart Socket on the left menu and then tap Smart Socket in the main window.

3. Using the reset toggle switch found on most transformers, turn it on, off, on, off, and on.
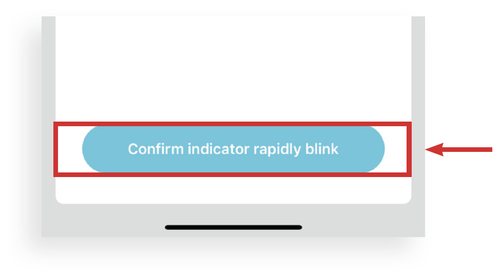
The lights in the power button of the Smart Socket will begin to flash rapidly to indicate the device is in Quick Mode.
Tap the Confirm indicator rapidly blink button.
4. Enter your 2.4 GHz Wi-Fi network name and password, and then tap Next.

6. The Adding Device screen is displayed while the app connects to the Smart Socket.
7. When the device is connected, the Added screen is displayed. Tap the Pencil icon to rename the device, then tap Done to finish.
NOTE: If Quick Mode Set Up does not connect, use the AP Mode Set Up instructions.
AP Mode Set Up – When There Is Only WiFi Network
Open the General Settings on your handheld device. Connect your device to the 2.4GHZ Wi-Fi network. Use this method when you can identify a 2.4GHZ Wi-Fi network. Be sure that Bluetooth is turned off.
1. On the home screen, tap the Add button at the upper-right corner.
2. On the Add Manually screen, tap Smart Socket on the left menu and then tap Smart Socket in the main window.
3. Enter your 2.4 GHz Wi-Fi network name and password, and then tap Next.

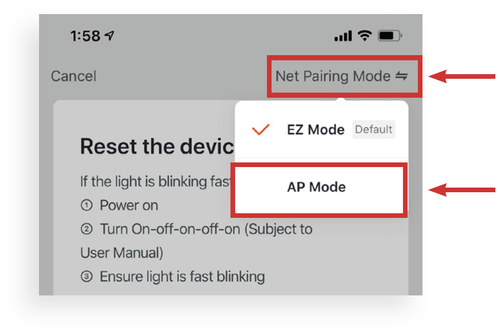
4. On the Reset screen, tap EZ Mode in the upper-right corner and then tap AP Mode.
5. Now you can reset the device. Turn it on, off, on, off, and on.
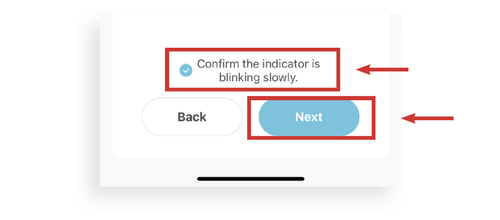
The lights in the power button of the Smart Socket will begin to flash slowly to indicate the device is in AP Mode.
To continue, tap Confirm indicator slowly blink and then tap Next.
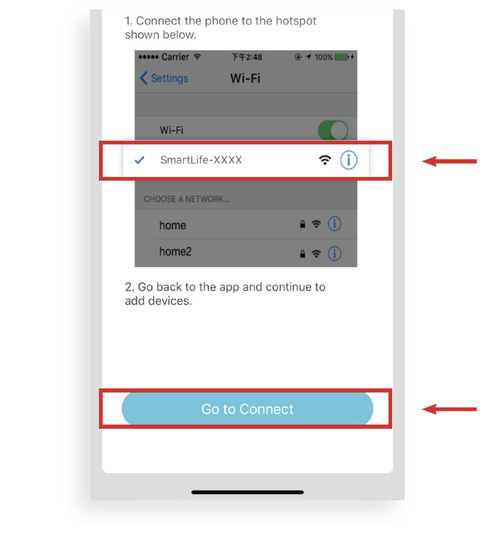
6. The next screen will take you to the device’s general settings once you tap Go to Connect. Go to your Wi-Fi networks, scroll and tap the network with SmartLife in the name.
7. Once the Smart Life network is connected, re-open the Brilliance Smart app.
The Connection screen shows the Smart Socket loading. It could take up to 40 seconds to populate.
After the Smart Socket has connected, AP Mode Set Up is complete and you can further program the device.

